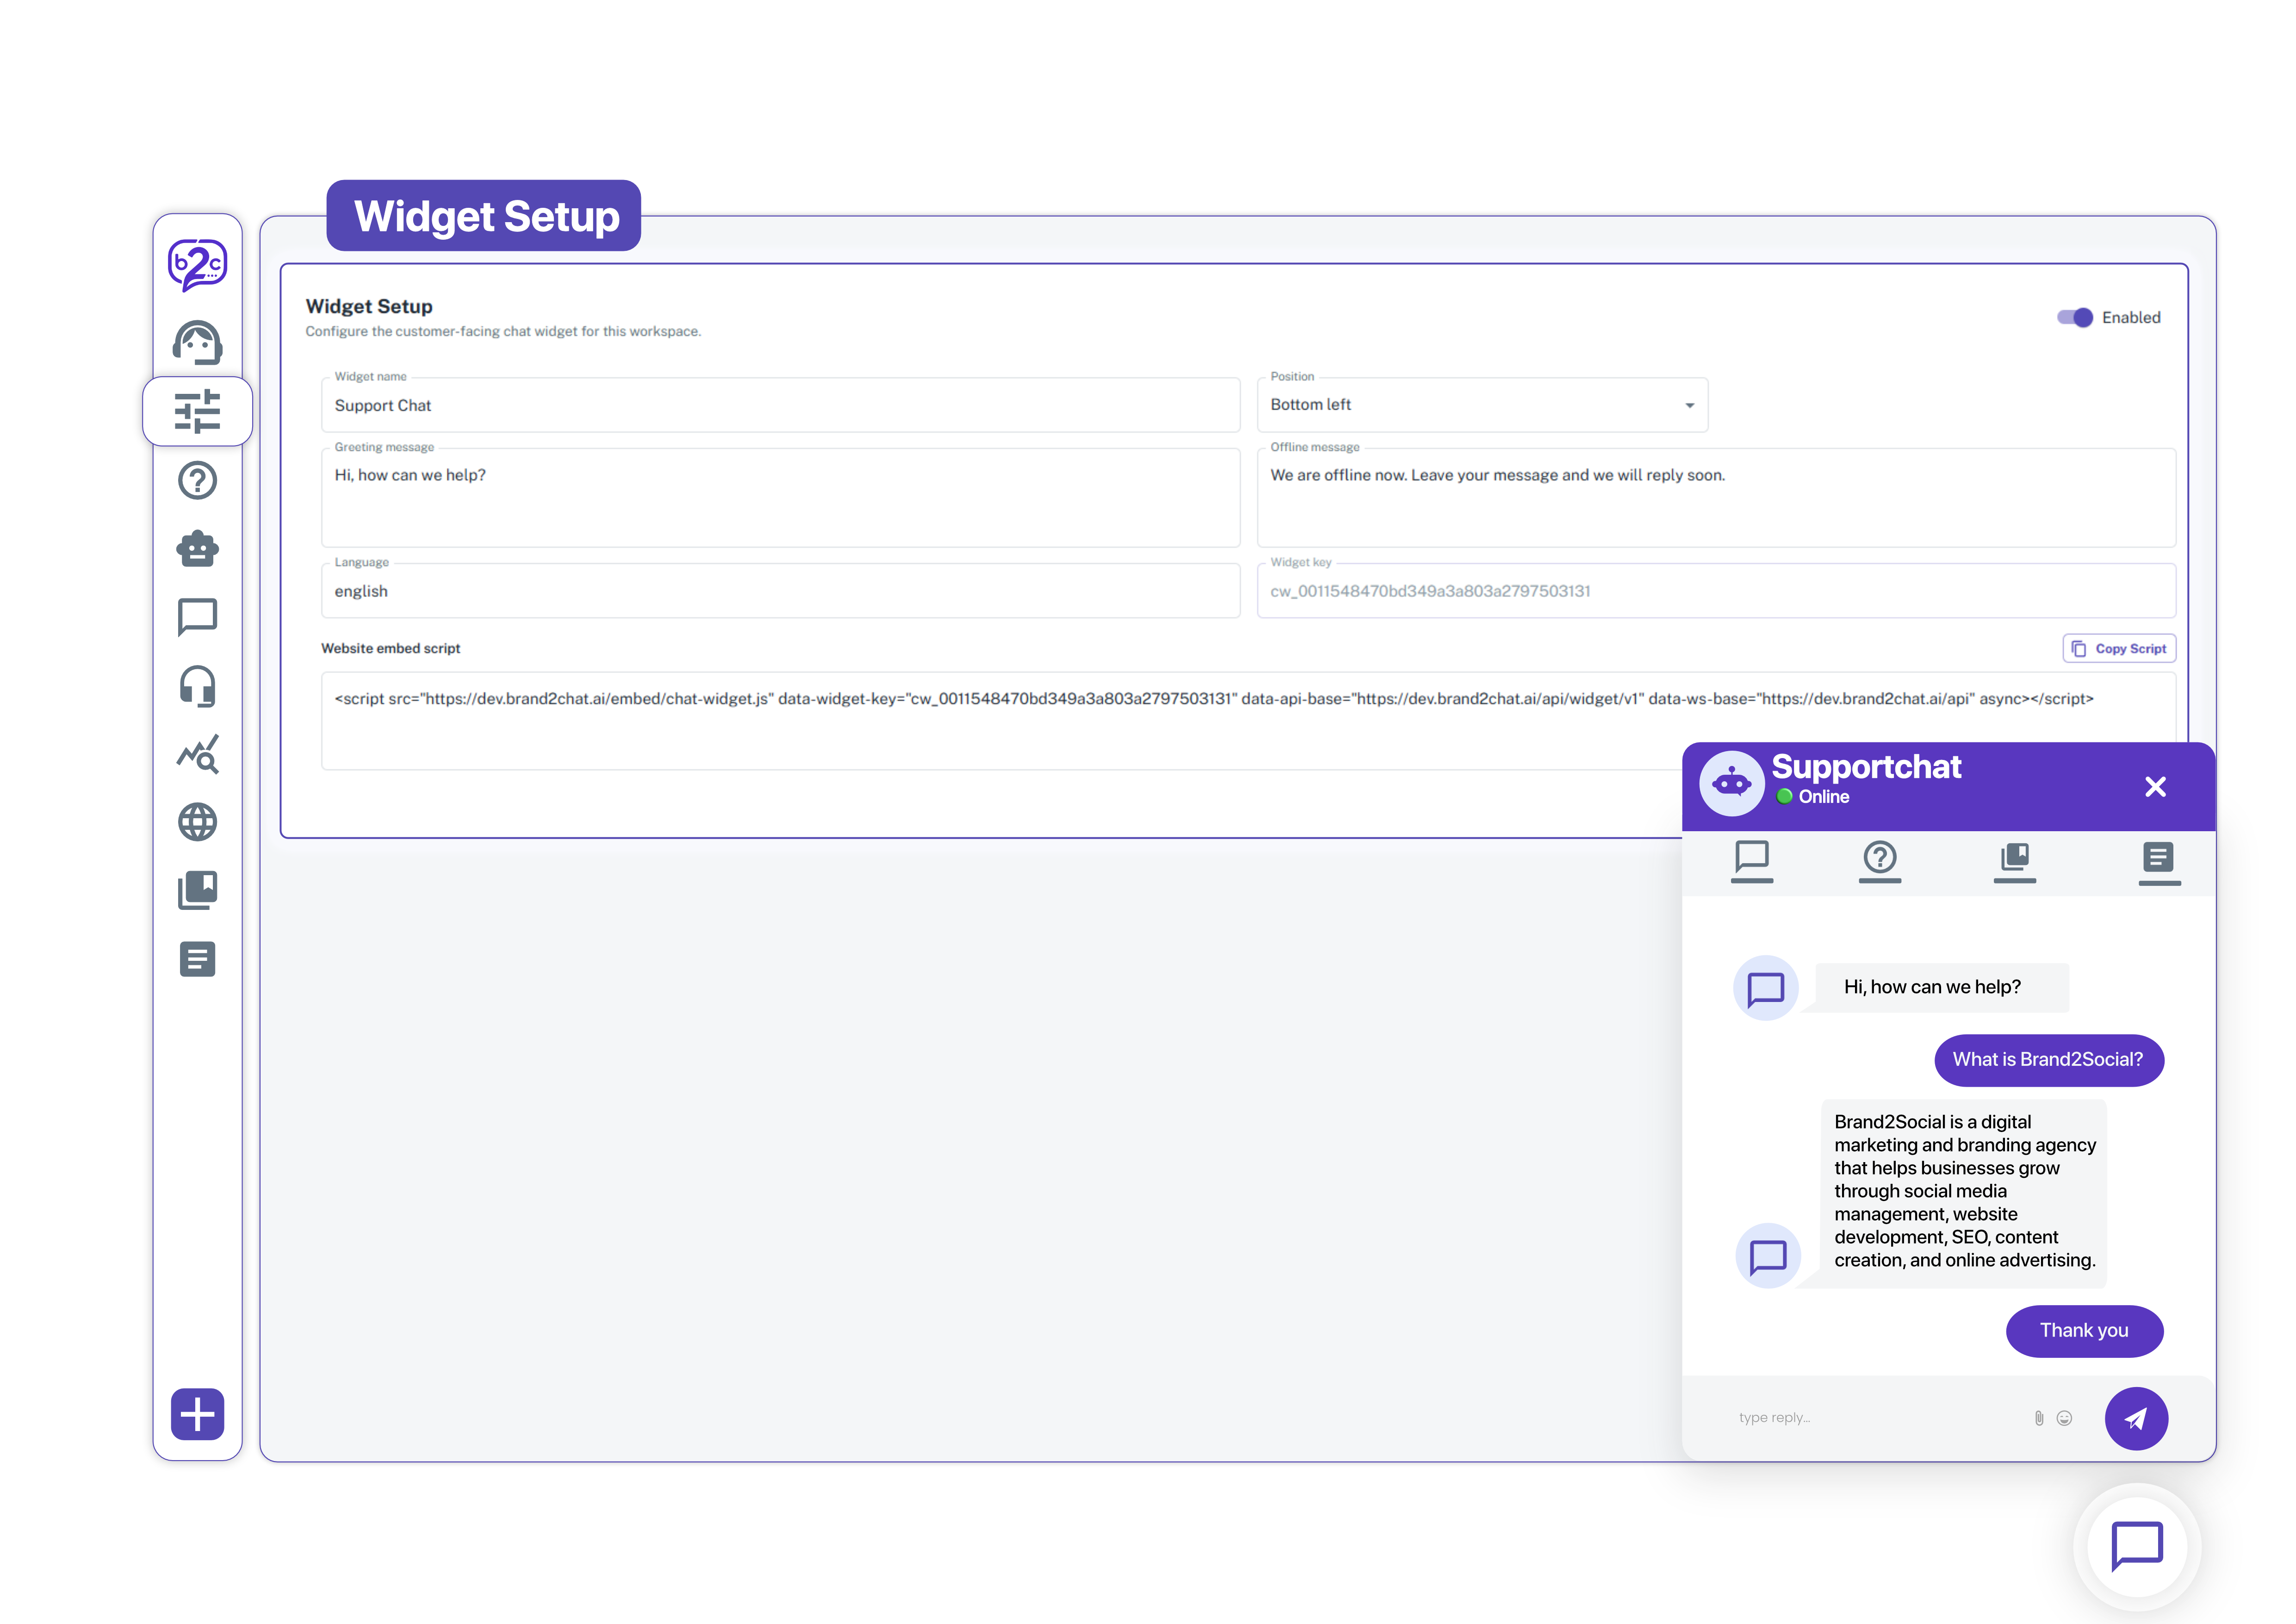
The Brand2Chat Widget Setup lets you configure the chat widget that appears on your website for your customers. You can activate the widget, customise its name and position, set your greeting and offline messages, and copy a ready-to-use embed script to install it on any website within minutes.
How to Access Widget Setup
1. Log in to your Brand2Chat account.
2. Click on Widget Setup in the left-side navigation menu, under Setup.
3. The Widget Setup page will load with two tabs: Widget Branding and Widget Settings.
Enabling the Widget
1. At the top right of the Widget Setup page, click the toggle switch to change the widget status from Inactive to Active.
2. When the widget is Inactive, the chat bubble will not appear on your website even if the embed script is installed useful during initial setup or maintenance.
Widget Branding Tab
Under the Widget Branding tab, you can set the widget’s name and position.
Widget Name
The internal name for your widget. This is also displayed to visitors as the title of the chat window (for example, “Support Chat”).
Position
Choose where the chat bubble appears on your website pages: Bottom Left or Bottom Right.
To save: After making changes, click Save Widget at the bottom right of the tab.
Widget Settings Tab
Under the Widget Settings tab, you can customise the messages your visitors see and find your widget’s connection details.
Greeting Message
The first message visitors see when they open the chat widget. Keep it friendly and helpful (for example, “Hi, how can we help?”).
Offline Message
The message displayed to visitors when none of your agents are available. This assures visitors their message has been received (for example, “We are offline now. Leave your message and we will reply soon.”).
Widget Key
A unique identifier automatically generated for your widget, shown as a read-only field. This is embedded in your script and connects the widget to your Brand2Chat workspace.
ℹ️ Note: Your Widget Key is unique to your workspace. Do not share it publicly or use it across multiple Brand2Chat accounts.
To save: After making changes, click Save Widget at the bottom right of the tab. Your changes are only applied once this button is clicked.
Website Embed Script
Below the Greeting/Offline message fields on the Widget Settings tab, you’ll find the Website embed script box with your unique embed code, similar to this:
<script src="https://app.brand2chat.ai/embed/chat-widget.js"
  data-widget-key="your-unique-widget-key"
  data-api-base="https://app.brand2chat.ai/api/widget/v1"
  data-ws-base="https://app.brand2chat.ai/api"
  async>
</script>
1. Click the copy icon in the top right of the box to copy the entire script.
2. Open your website’s source code and paste the script directly into the <body> tag, just before the closing </body> tag, on every page where you want the widget to appear.
3. The widget will appear automatically once the page loads (provided the widget is set to Active).
Hide/Show Widget API
For advanced control over when the chat widget appears on your site, use the Hide/show widget API functions provided below the embed script box:
window.BrandChat_API = window.BrandChat_API || {};
window.BrandChat_API.onLoad = function () {
  window.BrandChat_API.showWidget();
};

// Hide or display the widget later when needed:
// window.BrandChat_API.hideWidget();
// window.BrandChat_API.showWidget();
// const isHidden = window.BrandChat_API.isChatHidden();
1. Click the copy icon to copy the provided JavaScript functions.
2. Add them to your website’s code.
3. Call hideWidget() and showWidget() to dynamically hide or show the chat widget based on specific user actions or page rules, or use isChatHidden() to check its current visibility state.
Troubleshooting
The chat widget is not appearing on my website
- Confirm the embed script is placed correctly before the
</body>tag on your webpage. - Check that the toggle at the top right of the Widget Setup page is set to Active.
- Clear your browser cache and reload the page, as cached versions of the page may not show the updated script.
I updated my Greeting or Offline message but don’t see the change
- Go back to Widget Setup > Widget Settings, confirm your changes, click Save Widget, and reload your website.