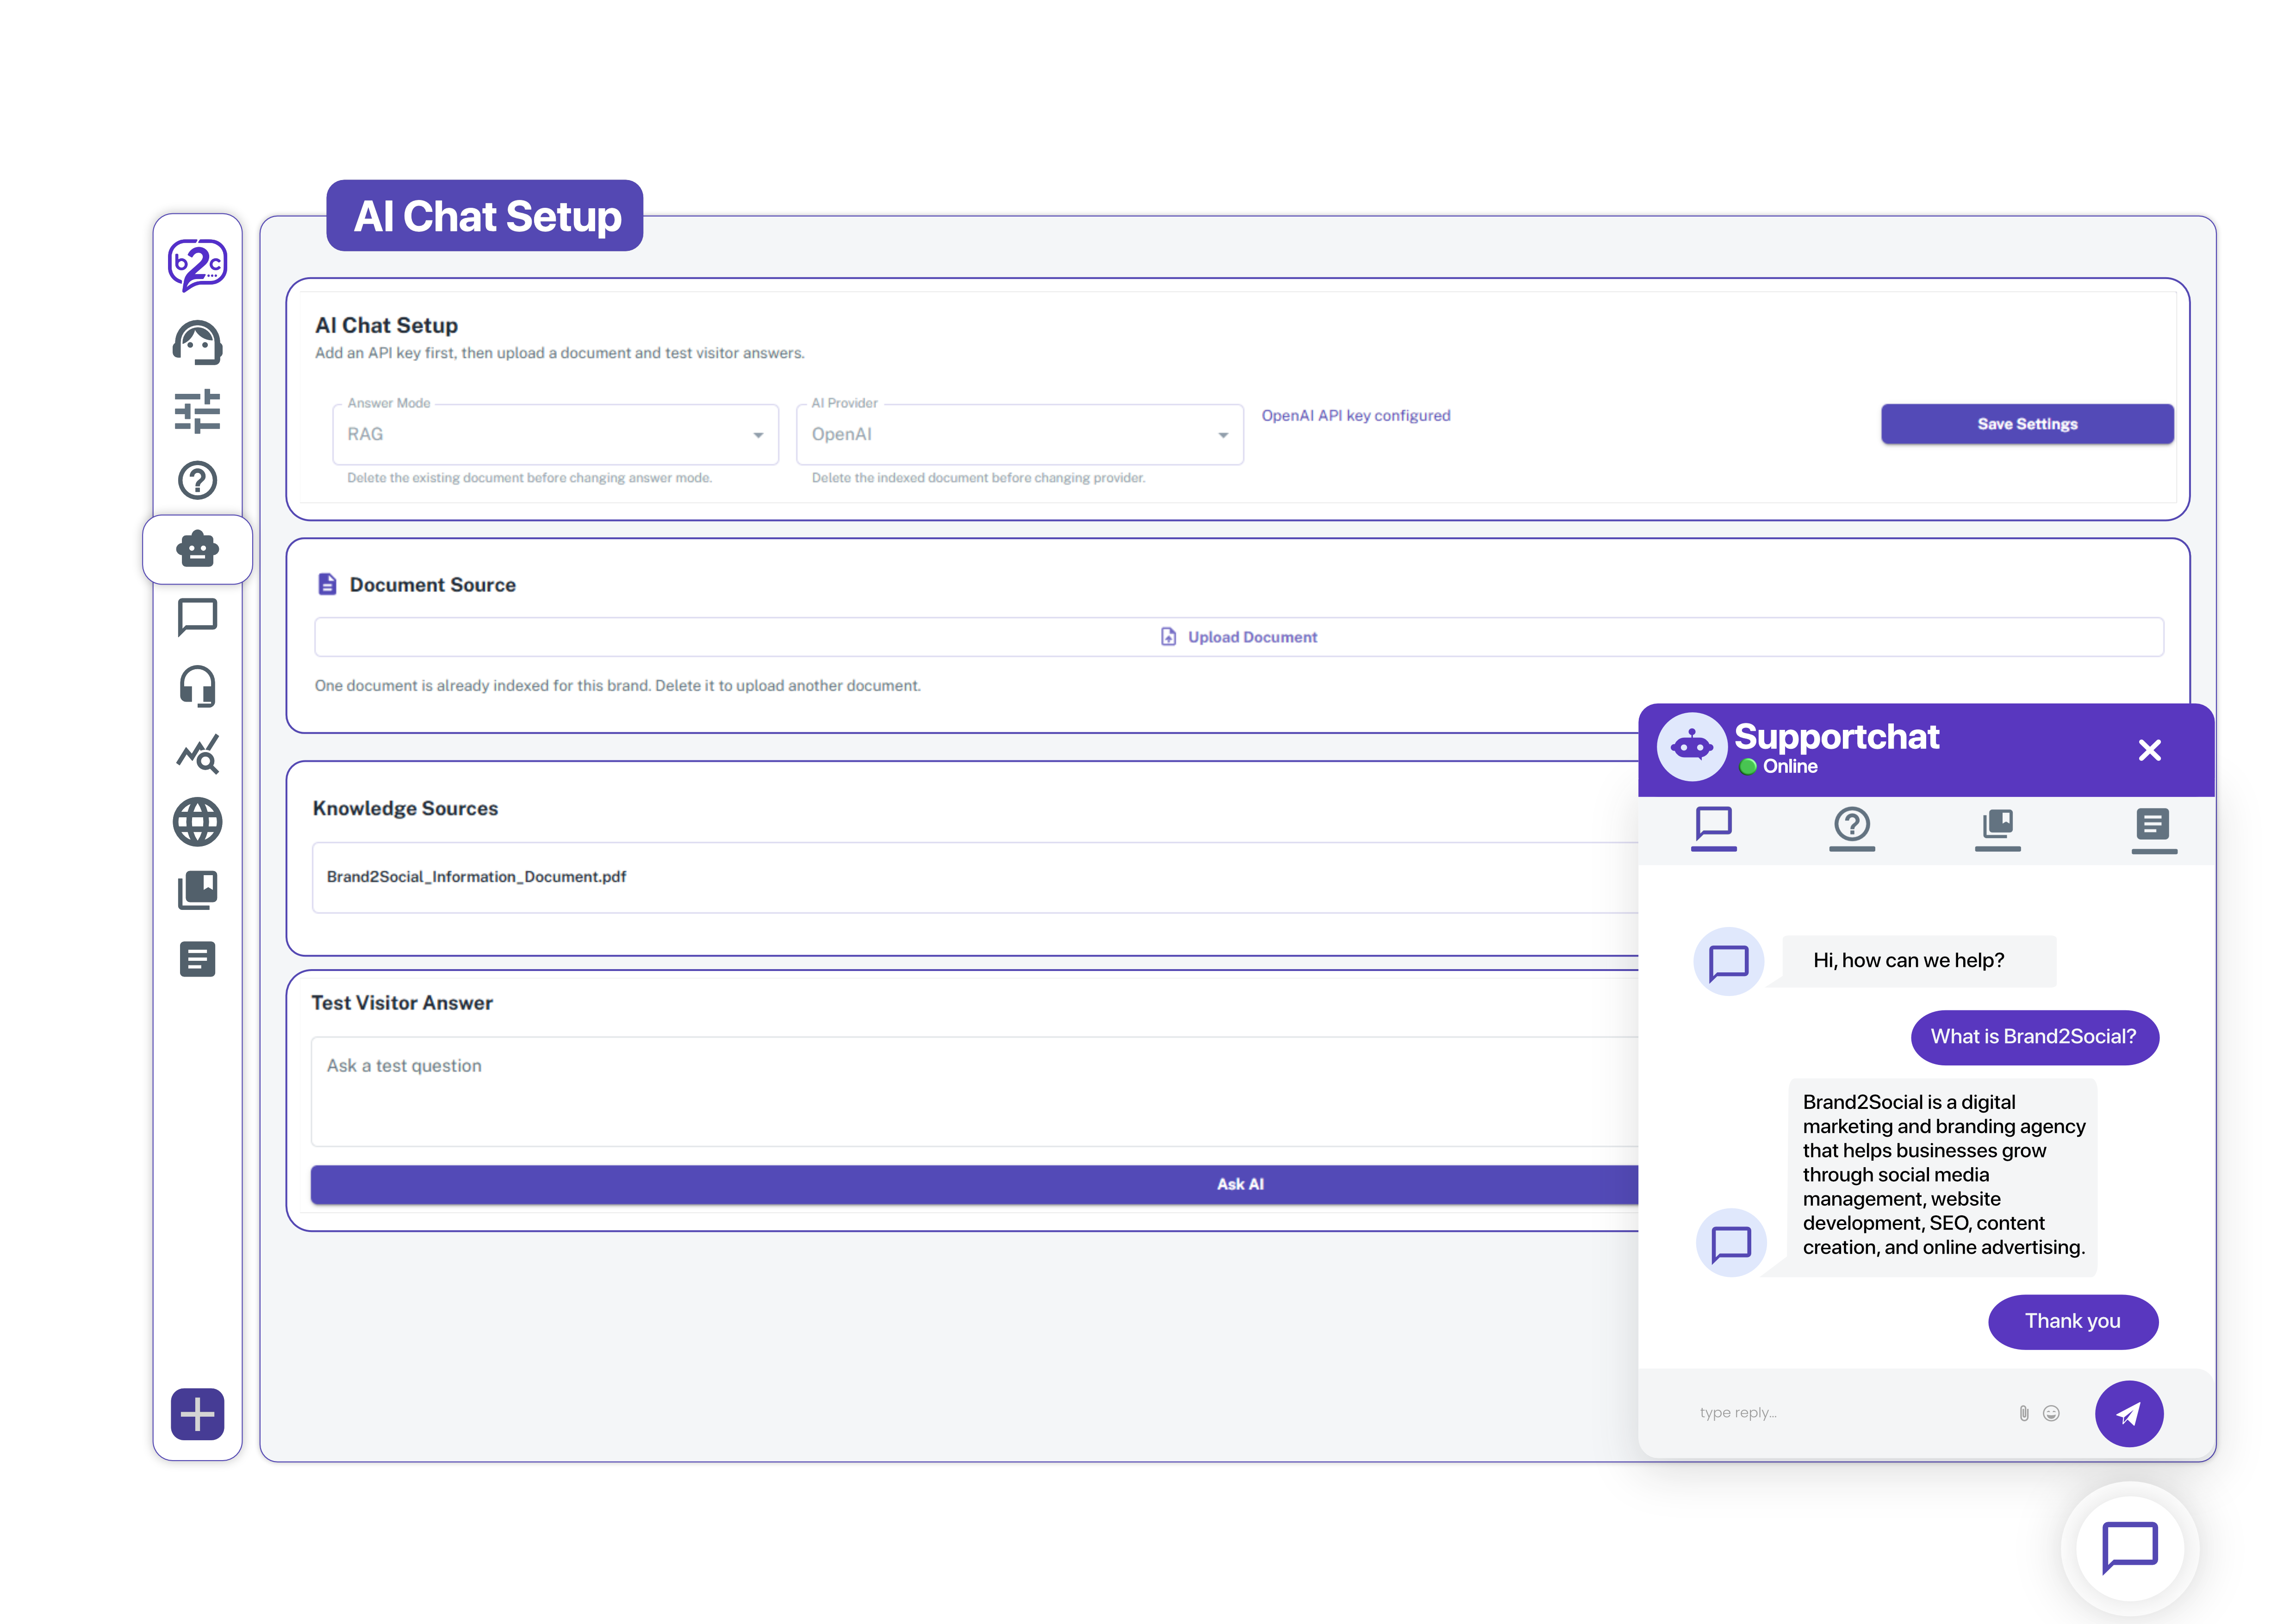
The Brand2Chat AI Chat Setup enables an AI-powered bot that automatically answers your visitors’ questions in real time without needing a live agent. You connect an AI provider with your own API key, upload documents containing your product or company information, and the AI uses them as its knowledge source to generate accurate, relevant answers. This reduces repetitive queries for your support team and provides customers with instant help at any time of day.
How to Access AI Chat Setup
1. Log in to your Brand2Chat account.
2. Click on AI Chat Setup in the left-side navigation menu, under Setup.
3. The AI Chat Setup page will load with settings for your API keys, Answer Mode, AI Provider, Document Source, and a Test panel.
How AI Chat Works
Brand2Chat supports two ways of generating AI answers, selected via Answer Mode:
- RAG document search (Retrieval-Augmented Generation) the AI reads your uploaded documents, indexes their content, and retrieves the most relevant sections to generate accurate answers to visitor questions. This keeps responses on-brand and grounded in what’s actually in your documents.
- OpenAI thread upload uses OpenAI’s native thread management to handle uploaded files and context directly.
The AI is powered by your choice of OpenAI or Gemini, and requires your own API key from the relevant provider to function.
Enabling the AI Chat Feature
1. At the top right of the AI Chat Setup page, click the toggle switch to change the status from Inactive to Active.
2. You’ll still need to add an API key, upload a document, and configure your settings before the AI can start answering visitors the toggle just controls whether the feature is on.
Setting Up Your AI Provider API Key
API keys are managed centrally in Brand Settings, not directly on the AI Chat Setup page.
1. On the AI Chat Setup page, click the Open Brand Settings button.
2. This takes you to Brand Info under Brand Settings. In the AI Chat Keys section, enter your OpenAI API Key and/or Gemini API Key into the respective field.
3. Click Save Changes to apply your key(s).
4. Back on the AI Chat Setup page, each provider will show as Added (green) once its key is saved, or Missing (amber) if it still needs one.
ℹ️ Note: You only need at least one provider’s API key added to continue setting up AI Chat you don’t need both.
Configuring Answer Mode & AI Provider
Once at least one API key has been added, configure how your AI chatbot processes and answers visitor questions.
Answer Mode
Choose your preferred method from the Answer mode dropdown:
- OpenAI thread upload: Uses OpenAI’s native thread management system to handle uploaded files and context. This mode only works when OpenAI is selected as the AI provider and requires an active OpenAI API key.
- RAG document search: Uses Retrieval-Augmented Generation to search through your uploaded knowledge sources and generate contextually accurate answers. Available for both OpenAI and Gemini.
⚠️ Note: RAG document search is a premium feature and is only available to users with a paid subscription for RAG.
AI Provider
In the AI provider field, select your active provider (OpenAI or Gemini) based on your chosen answer mode and available API key.
To save: Click Save Settings to save your configuration.
Uploading Knowledge Sources
To train your AI on your specific business details, products, or guidelines, upload reference documents.
1. Scroll down to the Document source section.
2. Click Upload Documents to add your training files.
Supported formats: PDF, DOCX, XLSX, PPTX, TXT, MD, CSV, JSON, HTML, or XML.
3. Once processed, your uploaded files will be listed under the Knowledge sources section.
ℹ️ Note: A Website Link option for crawling a URL as a knowledge source is shown on the page but marked Coming soon it isn’t available yet. For now, upload documents to train AI Chat.
Testing Visitor Answers
Before launching, test how the AI responds using your uploaded documents.
1. Scroll down to the Test visitor answer section at the bottom of the page.
2. Type a test query into the Ask a test question field.
3. Click the Ask AI button.
4. The system will process your query against your uploaded knowledge sources and display the response under Answer, so you can verify its accuracy before your AI Chat goes live.
Preparing Your Documents
The quality of AI responses depends heavily on the quality of the documents you upload. For best results:
- Include clear, well-structured content such as product descriptions, pricing details, policies, and FAQs.
- Avoid documents that are heavily image-based or scanned text-based files work best.
- Keep documents focused and relevant to the questions your customers are likely to ask.
Removing a Knowledge Source
1. Go to AI Chat Setup and scroll to the Knowledge Sources section.
2. Click the delete (trash) icon next to the document you want to remove.
3. Upload a replacement file under Document Source if needed, and wait for it to finish processing before testing again.
Troubleshooting
The AI is giving incorrect or irrelevant answers
- Review the content of your uploaded documents. If they don’t contain the answer to a question, the AI won’t be able to respond accurately.
- Make sure your documents are text-based and not scanned image files.
- Try removing and re-uploading a document to re-index it.
My API key is not being accepted
- Go to AI Chat Setup > Open Brand Settings and confirm your key was entered correctly, with no extra spaces, and that you clicked Save Changes.
- Make sure your OpenAI or Gemini account is active and has available API credits.
- If the issue persists, generate a new API key from your provider’s dashboard and re-enter it.
Answer mode options aren’t behaving as expected
- OpenAI thread upload only works when OpenAI is selected as your AI provider.
- RAG document search requires a paid subscription for RAG confirm your plan includes it if the option isn’t available.